Pre-requisites
Use Case
The Challenge: Manually creating branded presentations for clients is time-consuming and error-prone. The Solution: Brand.dev’s Brand API fetches logos and brand names to pre-fill Google Slides templates automatically using Make.com.Step-by-Step Guide
1. Design a Google Slides template
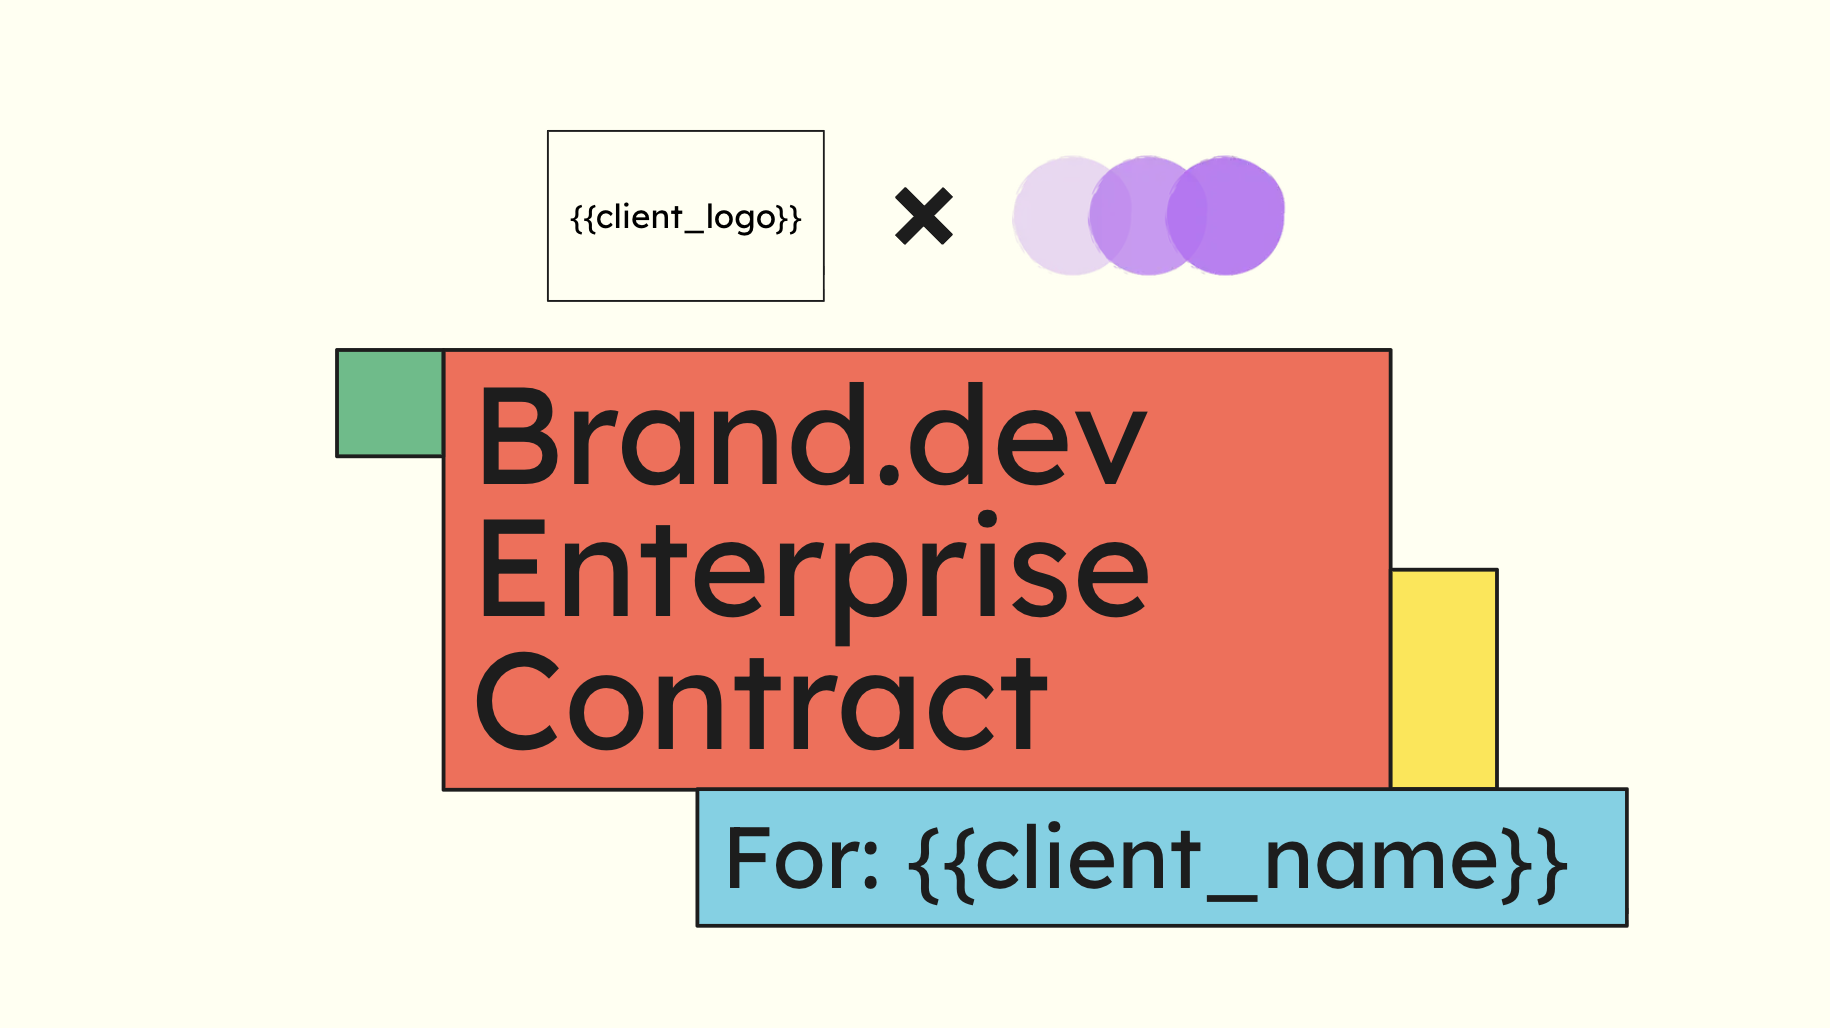
{{client_logo}} and {{client_name}} to indicate where the dynamic content should go. Placeholders must be wrapped in double curly braces.
For images you should insert a shape into the slide where you want the logo to appear. Then add text to the shape with the placeholder text (e.g., {{client_logo}}). This shape will be replaced with the actual logo image during the automation process. The logo will be resized to fit within the shape while maintaining its aspect ratio, thus the shape will act as a bounding box for the logo. In the example above I’ve included a outline around the shape to make it more visible in the tutorial, but you should remove the outline in your automation.
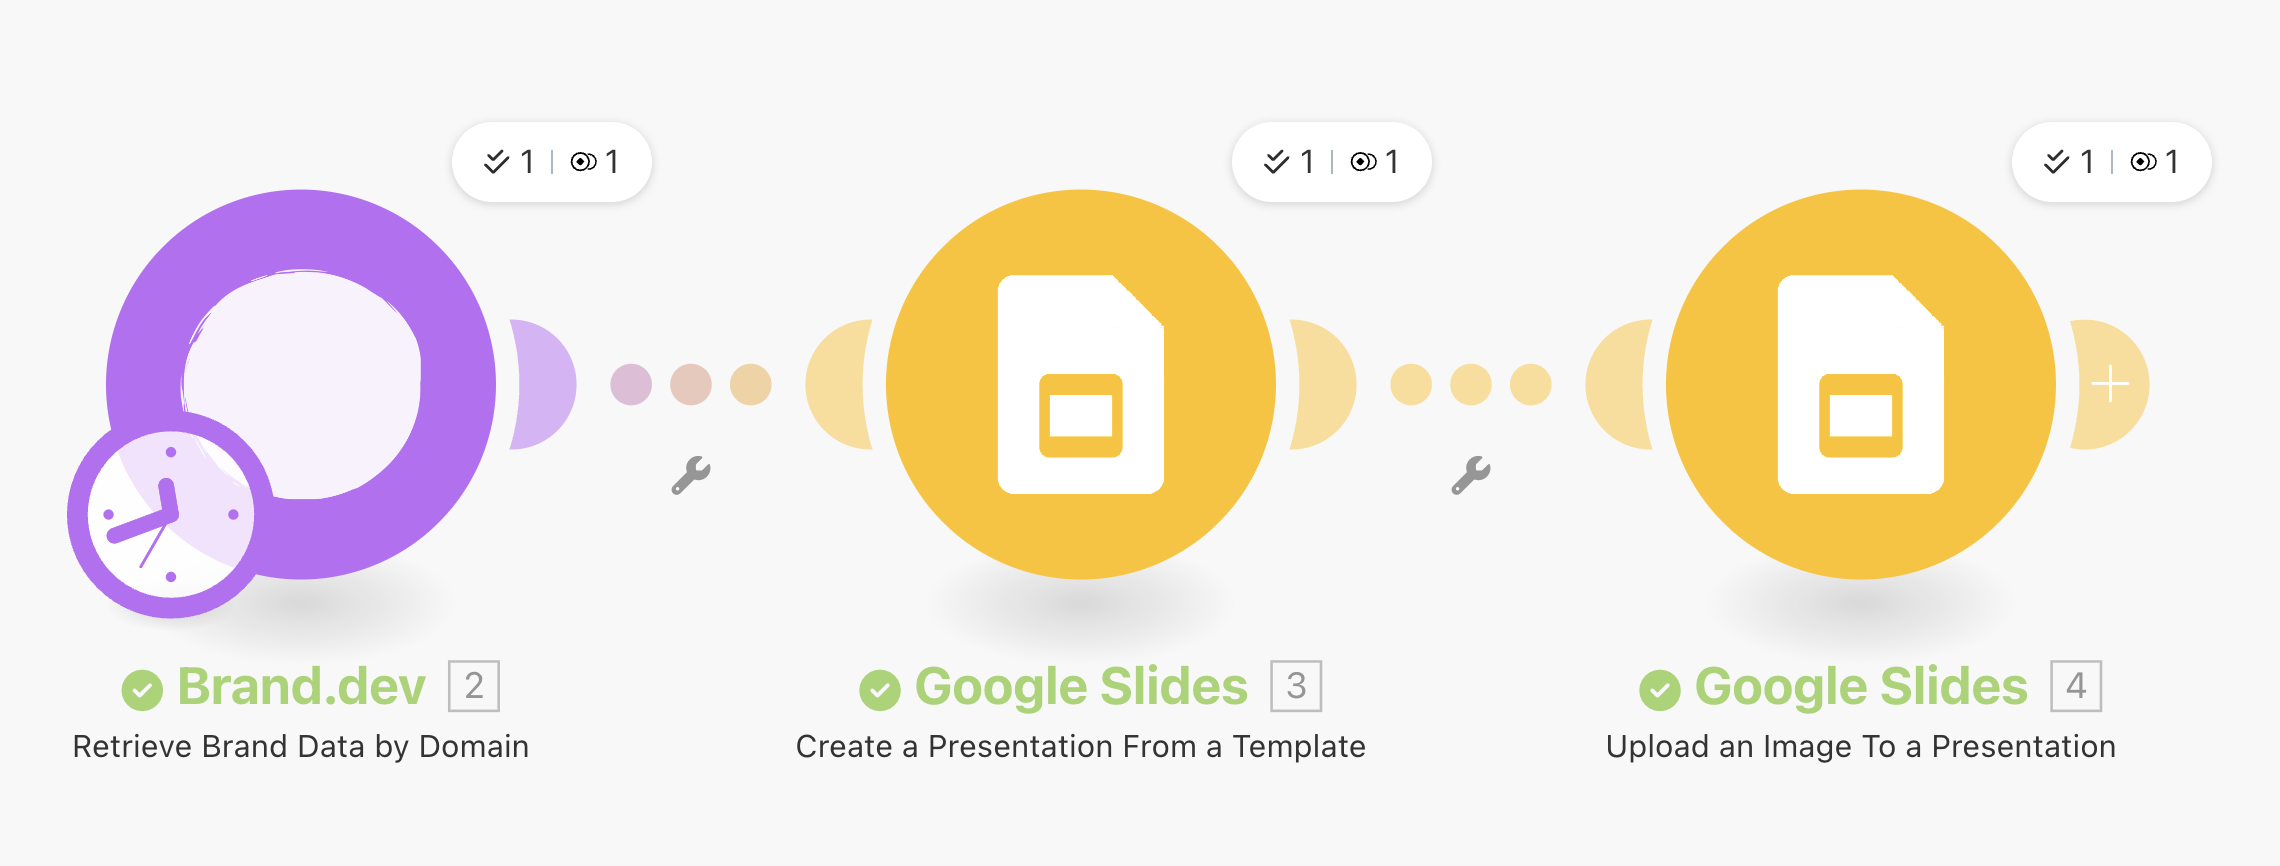
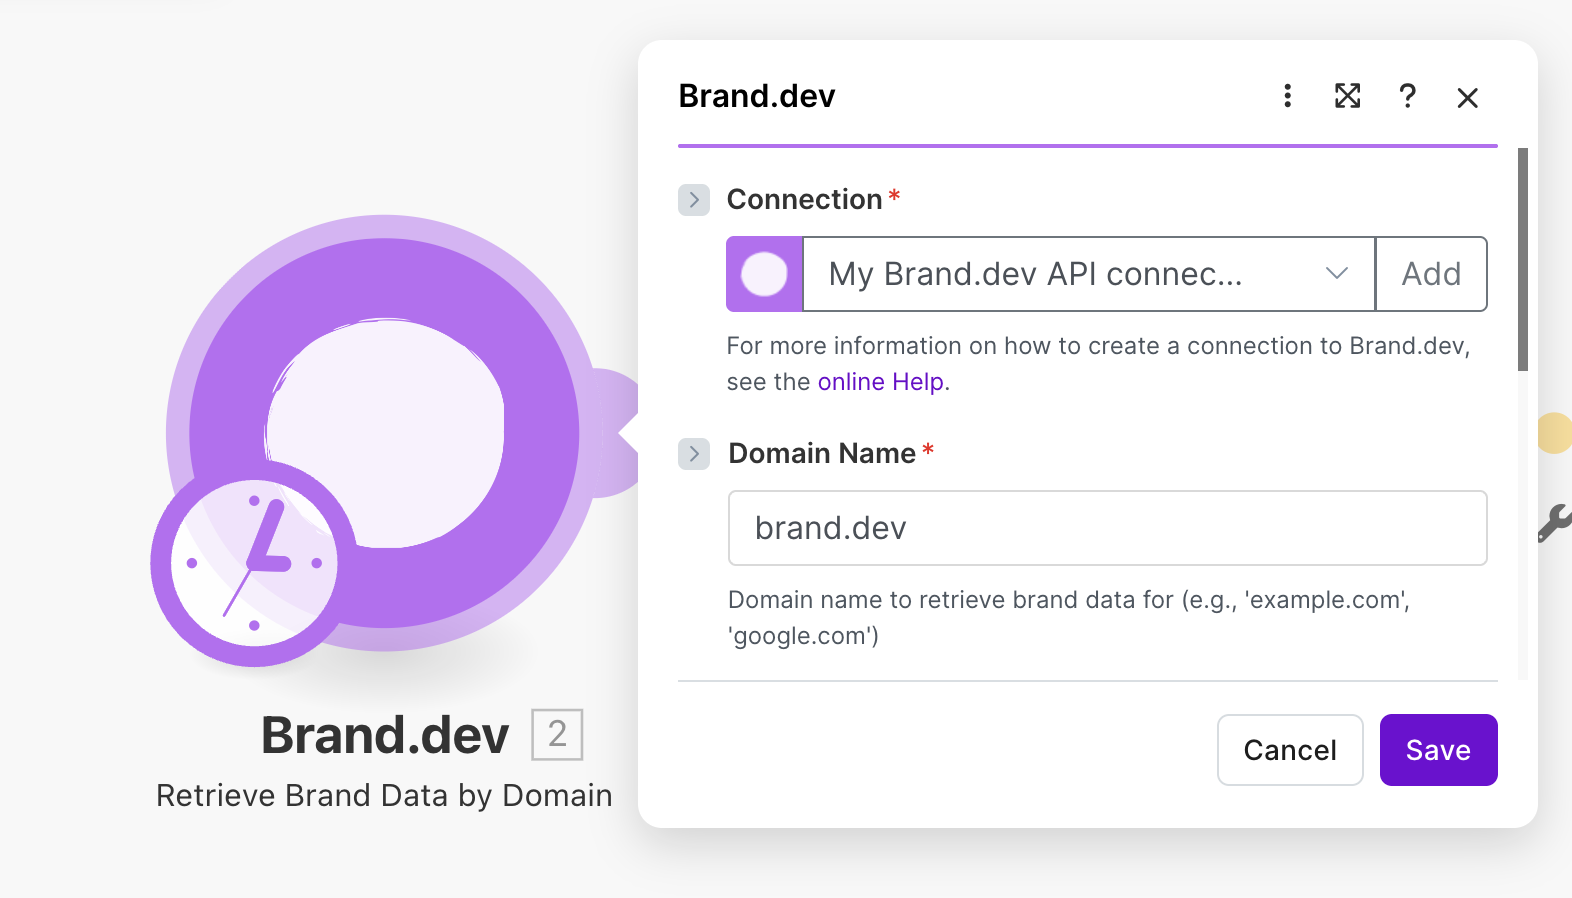
2. Set Up Make.com Scenario
3. Add the Google Slides Module
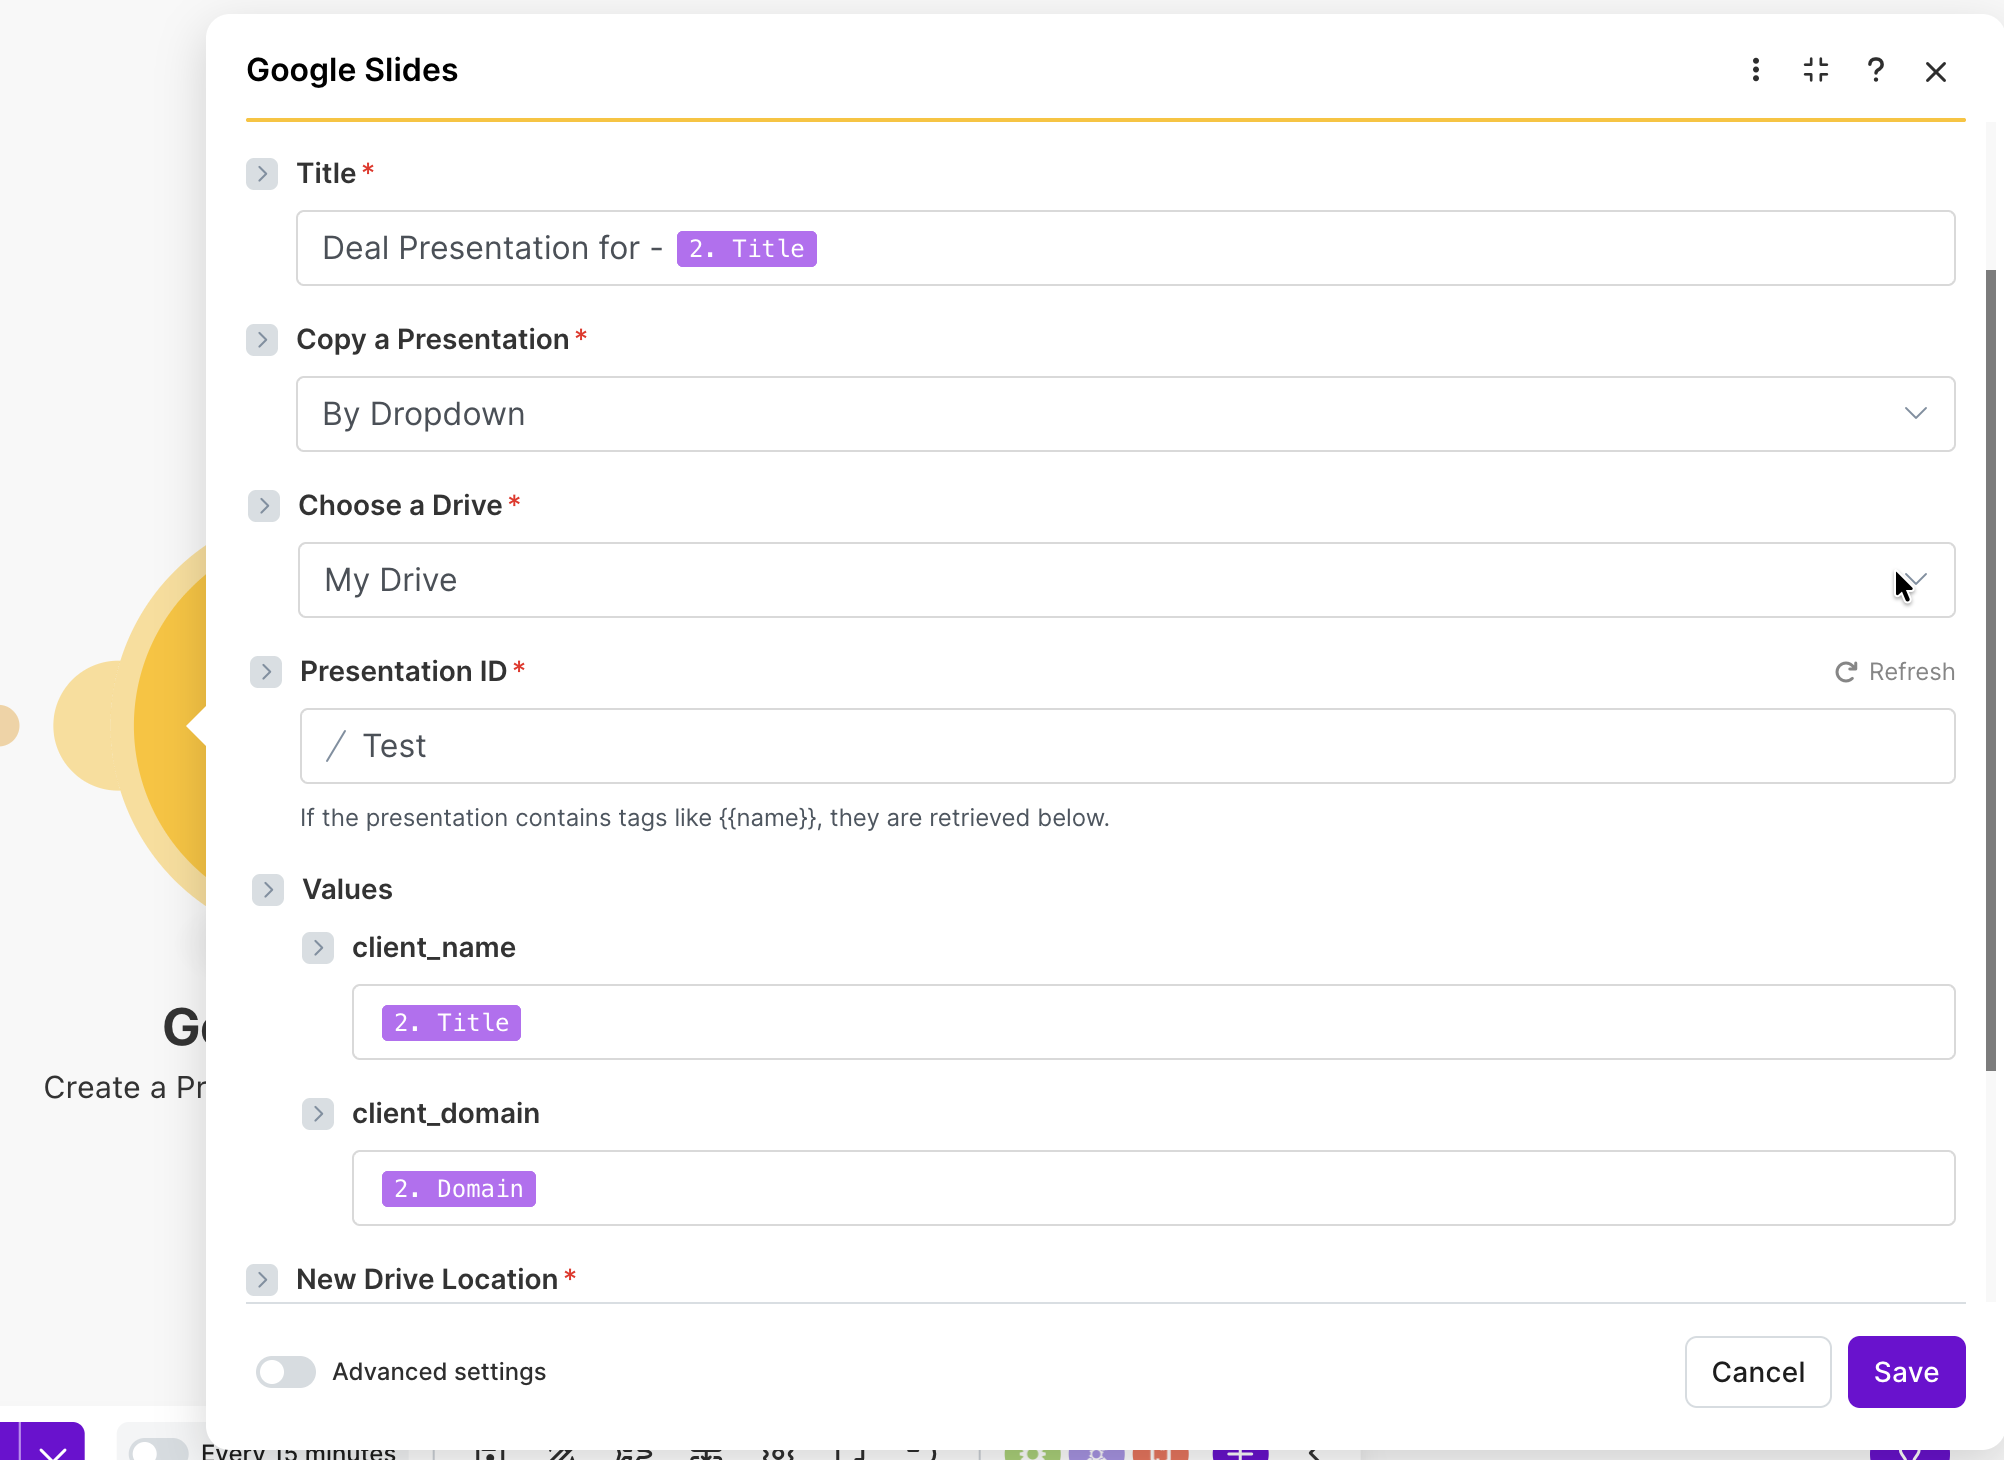
{{client_name}} to the company name field from my form, and {{client_logo}} to the logo URL from Brand.dev. I also added the company name to the name of the new presentation for easy identification.
You are also able to change the stored location and other properties of the created presentation by adjusting the other fields in this module.
The Google Slides template that you created must have the placeholders wrapped in double curly braces (e.g.,
{{client_logo}}) before you add this module. You can delete it and re-add it or change the presentation ID if you make changes to the template after adding the module.4. Replacing the Logo Placeholder
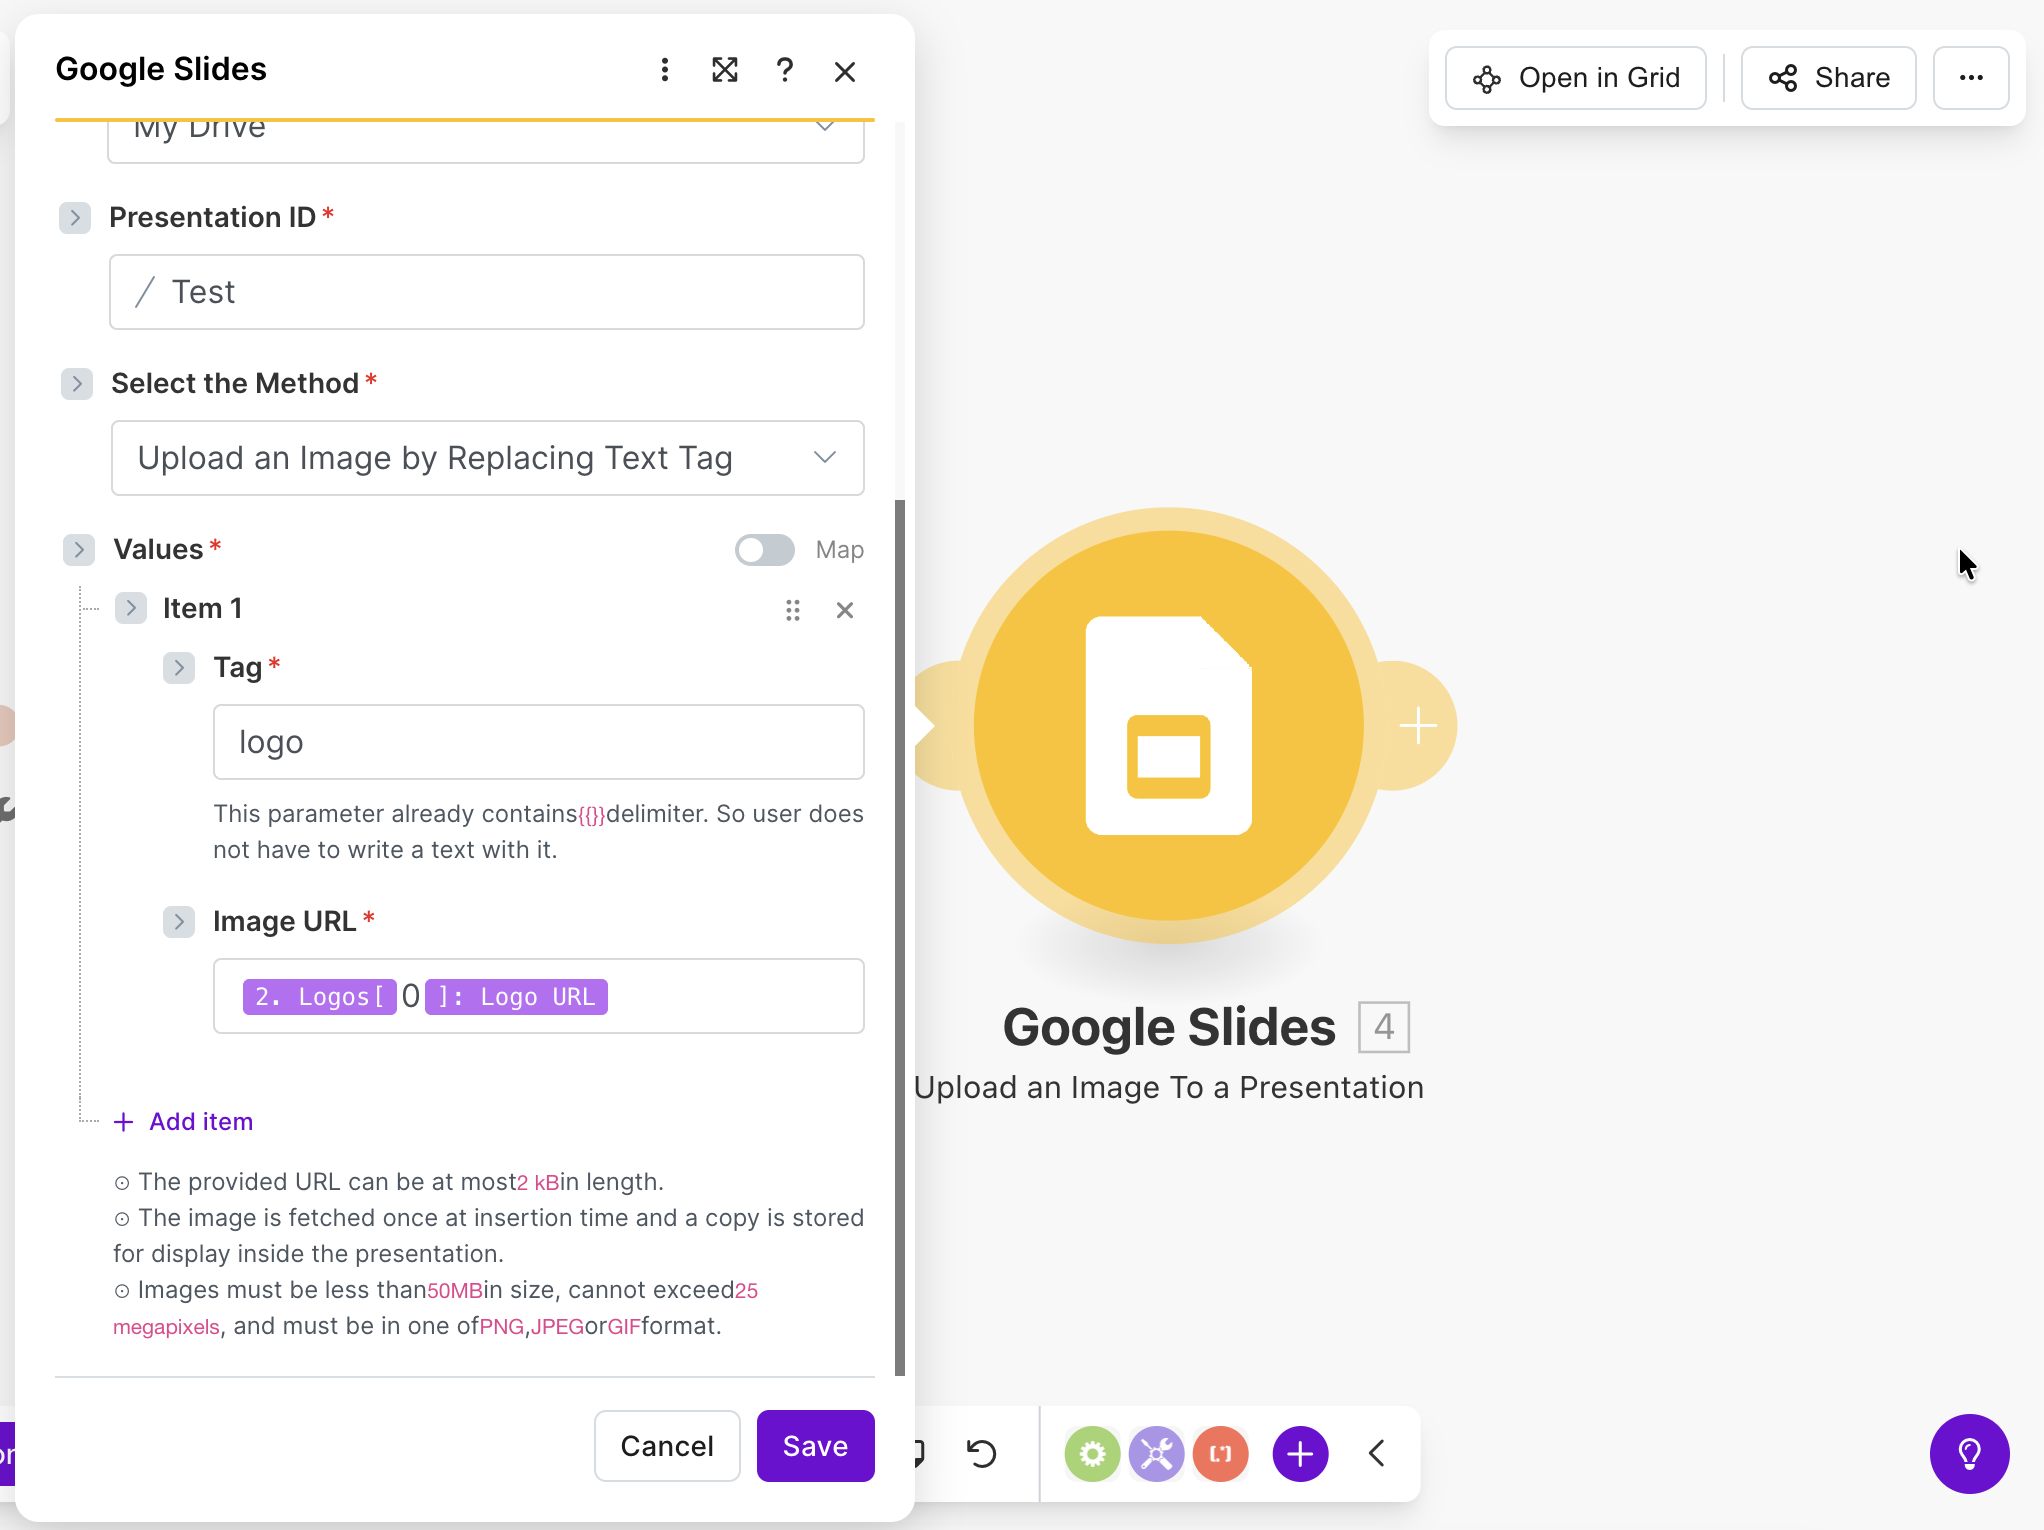
0 which is the primary logo for the brand.
5. Final step
You may want to add a final step such as:- sending a Slack message to your team notifying them of the new presentation template
- attaching the presentation to Asana, Linear, Notion, or your project management tool of choice
6. Test and Activate
Run a few tests to ensure everything works as expected. Once you’re satisfied, activate the scenario to automate the process!Results
Here’s what my final presentation looked like after running the automation for a fictional Pied Piper client: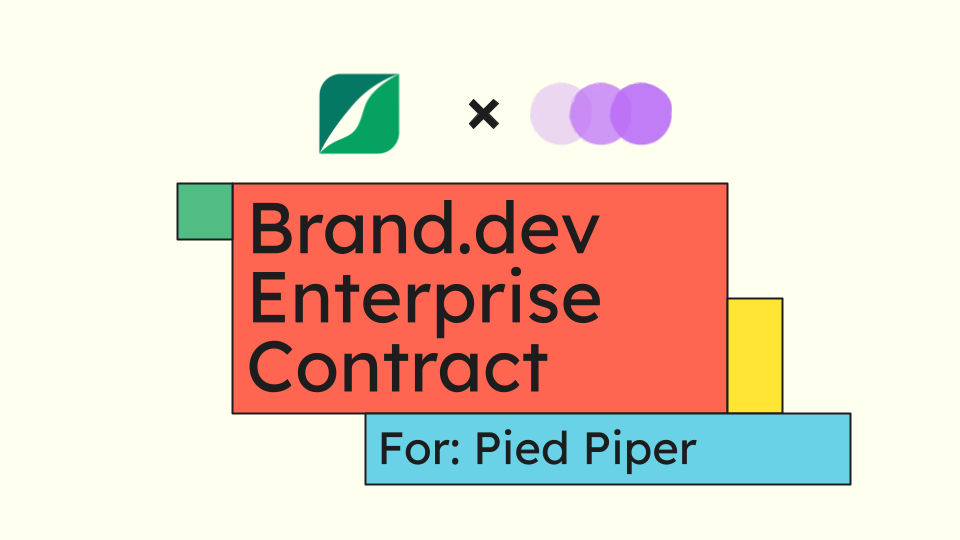
.png)
.png)
.png)